
We all know Figma makes regular updates to their features that can be new and awesome, like previewing typography, or it can be a modification that may change an established workflow, like the infamous local variables.
So as someone who uses Figma almost every work day, minus some meeting-heavy days, learning to apply new features or finding existing hidden gems helps me stay up-to-date in the app, but also optimizes my design workflow.
Since some Figma features aren’t as obvious on how to use them (or that they’re even there in the first place), I wanted to share my top Figma tips that have helped me become more organized and make bulk design edits quicker.
Some tips are new; others are old. Some are for designing, while others are for prototyping. New or not, I hope you pick up at least one tip that can help your Figma workflow.
!!! Important: I have a Figma work account with an ‘Enterprise plan’ so some tips may not be available on all plans. To be transparent, each tip includes a ‘Figma plan availability’ comment.
Table of contents
Multi-select matching layersMulti-edit textMulti-edit variantsRename layers in bulkUse Smart Animate prototype settingsPrototype with sectionsCustomize your home page’s sidebarView a component’s playgroundMin & max width / height for parent framesUse ‘big nudge’ to edit auto-layout, padding values, etc.Use ‘Command’ or ‘Control’ to isolate layer selections in a frameUse ‘Space’ to free-move an object
1. Multi-select matching layers (New tool!)
This new tool has replaced the ‘Select all # matching layers’ target symbol that appeared when selecting a component instance, shown below.
Figma plan availability: All plans‘Select matching layers’ target symbol, associated with component instances
Figma has changed this tool to give the ability to select any matching layer, component instance or not. Though it’s still called ‘Select matching layer’, it now appears in the toolbar when it is applicable to the layer that is actively selected.
‘Select matching layers’ tool in the top-middle toolbarIn a Figma file, select a layer within a frameOn the top-middle toolbar, click on the symbol that looks like a grid of four squares with dashed lines (or use Option+Command+A)Make bulk edits across all layersUse the ‘Select matching layers’ tool to make bulk edits
!!! Important: This tool is dependent on layer name and position within the frame. If layers have different names or are in a different order in its parent frame, the tool won’t appear on the toolbar or won’t select all intended layers.
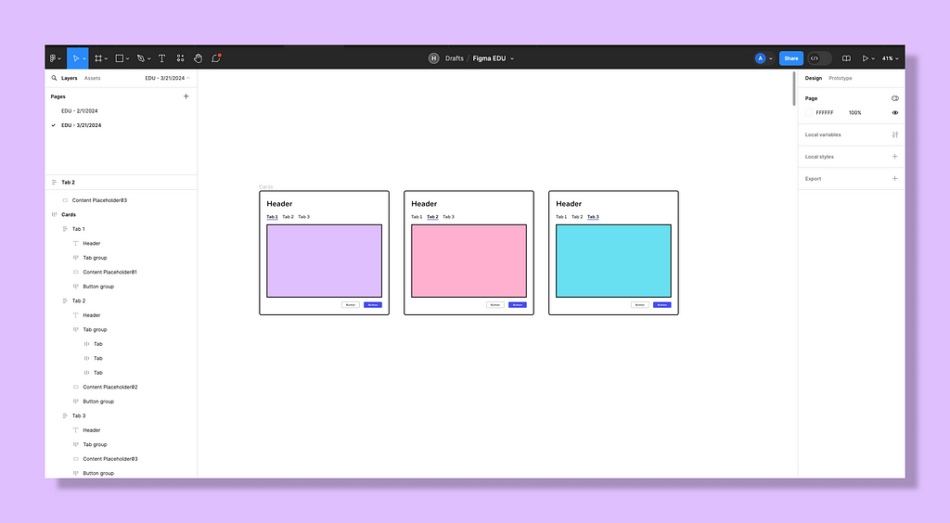
2. Multi-edit text (New tool!)
Only having to edit text in one place instead of 20+ times? Yes please. Though new, this tool will be personally saving me loads of time when I get feedback on UX writing.
Figma plan availability: All plans‘Multi-edit text’ tool in the top-middle toolbarSelect text layers directly from the layers panel, the canvas, or by using the select matching layers toolOn the top-middle toolbar, click on the symbol that includes a vertical line with two overlapping A characters (or press Enter)Make bulk edits to all text selectionsUse the ‘Multi-edit text’ tool to make bulk edits
3. Multi-edit variants (New tool!)
A win for Design System designers. This allows bulk-editing to selected variants in a component set and is a life-saver for complex changes.
Figma plan availability: All plans‘Multi-edit variants’ tool in the top-middle toolbarSelect a variant in a component setOn the top-middle toolbar, click on the symbol that includes two overlapping squares with a cursor (or press Q)Make bulk edits to all variantsUse the ‘Multi-edit variants’ tool to make bulk edits to component sets
!!! Important: At this time, you can’t isolate certain variants in a set using this tool, so the bulk edits must apply to EVERY variant in the component set. Fingers crossed they expand this capability in the future.
4. Rename layers in bulk
As shown in the previous tips, naming layers is important! I can be a ‘Frame 437’ designer, but some of these tips won’t work if you have hundreds of frames named from the default created.
Figma plan availability: All plansSelect all applicable layers in the layers panel or on the canvasRight-click on the layers panel and click ‘Rename’Make naming adjustments as needed in the pop-upClick ‘Rename’Rename layers in bulk
5. Use Smart Animate prototype settings
Create smooth transitions between prototype interactions, BUT your layers must have matching names to animate correctly.
Figma plan availability: All plansIn the Prototype tab, create a prototype ‘noodle’ or interaction between framesIn the interaction details menu, make sure ‘Smart animate’ is selectedCheck the prototype to ensure layers are smoothly animatingPrototype with the Smart animate setting
6. Prototype with sections
Instead of having to create multiple prototypes for user flows or insane connections for every frame in the prototype, a section allows the prototype to remember where the user ‘exited’ when they return.
Figma plan availability: All plansOrganize frames in relation to a user task (I.E., filling out a form)Create a section around the related frames and name it (or use Command+S)From the frame that leads into the section, use a ‘Navigate to’ prototype interactionTest the prototype outPrototype with sectionsSave the user’s place with sections in the prototype
7. Customize your home page’s sidebar
Create and modify sections to easily find Figma files opened frequently.
Figma plan availability: Organization & EnterpriseOn the home page, go to the left sidebarClick the “Create new section” [+] button next to an existing sectionName the sectionAdd a new section to Figma’s sidebar
Next, add files to the new section.
On the home page, right-click on a file to move to the sectionFind the ‘Add to sidebar’ label, and select the new section’s nameAdd a file to a sidebar section from the home pageOR from an individual file, click on the dropdown arrow on the right of the file’s name on the top toolbarFind the ‘Add to sidebar’ label, and select the new section’s nameAdd a file to a sidebar section from the individual file
When needed, modify the sidebar sections.
Rename or delete sections from the ‘More’ icon […]Rename or delete a sidebar section from the home pageRemove a file from a section by right-clicking on the file name, then clicking ‘Remove from sidebar’Remove an individual file from a sidebar section from the home page
8. View a component’s playground
View a Design System’s component + description, and manipulate its properties and variables before inserting it into the file; if using a library.
Figma plan availability: All plansOn a Figma file, go to the Assets panelFind a Design System/ LibraryClick on a component to pull up the playgroundManipulate the component to match design needsClick ‘Insert instance’ to import to the file
9. Min & max width / height for parent frames
Great for creating responsive design, but constraining them. This is a great feature for Design System designers and creating their system’s grids.
Figma plan availability: All plansSelect a parent frame on the canvasOn the design panel, click the dropdown arrow next to the W (for width) or H (for height)Click ‘Add min width’ or ‘Add max width’ (same for height)Manually insert the value OR click the dropdown arrow next to the new field that appears to apply a variableSet the auto-layout on the parent frame accordingly for responsiveness (use auto-fill or have children layers set to fill)Add min and max values to width and heightConstrain responsiveness using min and max values
To remove min and max values:
Select the parent frame containing the min and/or max valuesOn the design panel, select the W (width) or H (height) dropdownClick ‘Remove min and max’
10. Use ‘big nudge’ to edit auto-layout, padding values, etc.
Quickly change values within a frame’s auto-layout, padding, margins, or whatever values being used in the design panel. I recommend setting the big nudge to matching your Design System’s grid; for me, it’s 8px.
Figma plan availability: All plansSet up your ‘big nudge’ by going to the Figma ‘F’ logo in the top-left cornerHover over ‘Preferences’, then click on ‘Nudge amount’Set the ‘Big nudge’Go to a frame that uses auto-layoutClick on a value within the auto-layout, and use Shift+Up/Down keyUse ‘Big nudge’ to update values within the design panel
11. Use ‘Command’ or ‘Control’ to isolate layer selections in a frame
If using click + drag to make a selection, even selecting a tiny portion of a frame will select the ENTIRE frame. What if I don’t want to select the whole frame?
Figma plan availability: All plansPress Command (Mac) or Control (Windows) and select individual layers in a frameUse ‘Command’ or ‘Control’ to isolate selections in a frame
12. Use ‘Space’ to free-move an object
Want to mock something up quickly without having to go through the pain of blowing up auto-layout and using absolute positioning? Use space key.
Figma plan availability: All plansAfter selecting a layer, press the ‘Space’ key and move the layer to the desired location in the parent frameUse ‘Space’ to free-move an object above a frame with auto-layout
That’s all I got for now!
Just know that Figma is not a walk in the park with keeping up with these new features or even getting Figma to do what you want it to. A lot of the time, I don’t get it on the first try and have to troubleshoot it myself or go to the nearest Figma forum for help.
The second, third, or maybe the fourth attempt is where you learn how to do it for the next time… until Figma decides to change that feature. *cries*
I hope you got one tip that can help your Figma-ing. Thanks for reading 🙂
12 Figma tips to work more efficiently was originally published in UX Collective on Medium, where people are continuing the conversation by highlighting and responding to this story.


